Musique

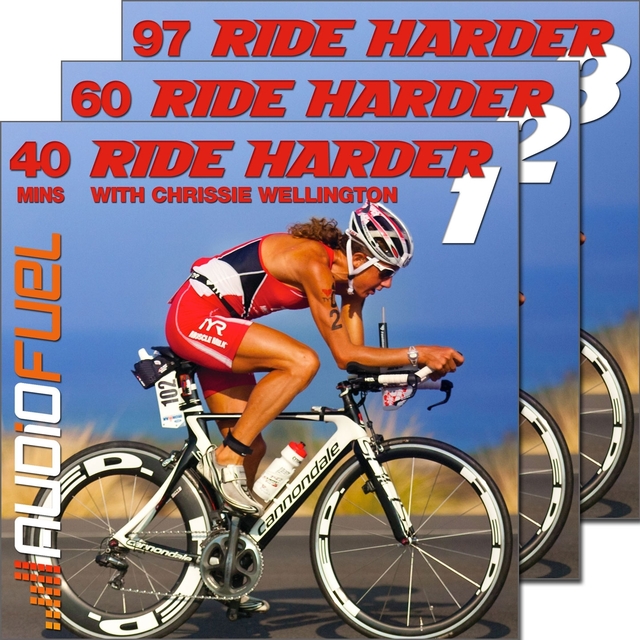
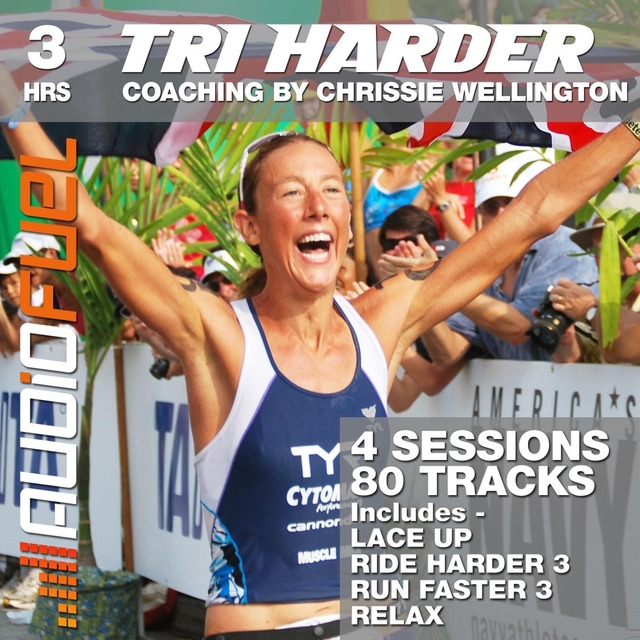
Tri Harder With Coaching from Chrissie Wellington - Podium Bundle Includes 8 Sessions: Motivation to Lace Up. Turbo Training With Ride Harder 1, 2 and 3. Interval Training With Run Faster 1, 2 and 3. Relax and Visualise With Chrissie
- artiste(s) : AudioFuel
- date : 24 février 2012
- catégorie : Electro
Titres
- 43 Ride Harder 3 Cool Down 10:02
- 42 Effort 3.21 - 4x1 - Final 1 Min At 60 RPM - On the Way Down 1:00
- 41 Recovery 3.20 - On the Way Down 1:00
- 40 Effort 3.20 - 4x1 - Third 1 Min At 60 RPM - On the Way Down 1:00
- 39 Recovery 3.19 - On the Way Down 1:00
- 38 Effort 3.19 - 4x1 - Second 1 Min At 60 RPM - On the Way Down 1:00
- 37 Recovery 3.18 - On the Way Down 1:01
- 36 Effort 3.18 - 4x1 - First 1 Min At 60 RPM - On the Way Down 1:00
- 35 Recovery 3.17 - On the Way Down 1:00
- 34 Effort 3.17 - 3x2 - Final 2 Min At 70 RPM - On the Way Down 2:00
- 33 Recovery 3.16 - On the Way Down 1:00
- 32 Effort 3.16 - 3x2 - Second 2 Min At 70 RPM - On the Way Down 2:00
- 31 Recovery 3.15 - On the Way Down 1:00
- 30 Effort 3.15 - 3x2 - First 2 Min At 70 RPM - On the Way Down 2:00
- 29 Recovery 3.14 - On the Way Down 1:30
- 28 Effort 3.14 - 2x3 - Final 3 Min At 80 RPM - On the Way Down 3:00
- 27 Recovery 3.13 - On the Way Down 1:30
- 26 Effort 3.13 - 2x3 - First 3 Min At 80 RPM - On the Way Down 3:00
- 25 Recovery 3.12 - On the Way Down 2:00
- 24 Run Faster 3 Cool Down 5:12
- 24 Effort 3.12 - 1x5 - 5 Min At 85 RPM - On the Way Down 5:00
- 23 Recovery 3.11 - On the Way Down 2:00
- 23 Strides 3.4 - Final 30 Second All Out Sprint 0:31
- 23 Ride Harder 2 Cool Down 5:04
- 22 Effort 3.11 - Top of the Pyramid - 10 Mins At 92 RPM 10:00
- 22 Recovery 3.10 - 30 Seconds 0:31
- 22 Run Faster 2 Cool Down 5:13
- 22 Effort 2.11 - 1 Min At 60 RPM - On the Way Down 1:00
- 21 Recovery 3.10 - On the Way Up 2:00
- 21 Strides 3.3 - Third 30 Second All Out Sprint 0:31
- 21 Strides 2.4 - Final 30 Second All Out Sprint 0:30
- 21 Recovery 2.10 - On the Way Down 1:00
- 20 Effort 3.10 - 1x5 - 5 Min At 85 RPM - On the Way Up 5:00
- 20 Recovery 3.9 - 30 Seconds 0:30
- 20 Recovery 2.9 - 30 Seconds 0:31
- 20 Effort 2.10 - 2 Min At 70 RPM - On the Way Down 2:00
- 19 Strides 3.2 - Second 30 Second All Out Sprint 0:31
- 19 Strides 2.3 - Third 30 Second All Out Sprint 0:30
- 19 Recovery 3.9 - On the Way Up 1:30
- 19 Recovery 2.9 - On the Way Down 1:00
- 19 Ride Harder 1 Cool Down 3:02
- 18 1.9 - 1 Min Effort At 60 RPM - On the Way Down 1:00
- 18 Recovery 3.8 - 30 Seconds 0:29
- 18 Recovery 2.8 - 30 Seconds 0:31
- 18 Effort 3.9 - 2x3 - Final 3 Min At 80 RPM - On the Way Up 3:00
- 18 Effort 2.9 - 2 Min At 70 RPM - On the Way Down 2:00
- 17 Recovery 2.8 - On the Way Down 1:30
- 17 Strides 3.1 - First 30 Second All Out Sprint 0:31
- 17 Strides 2.2 - Second 30 Second All Out Sprint 0:32
- 17 Recovery 3.8 - On the Way Up 1:30
- 17 Recovery 1.8 - On the Way Down 1:00
- 16 Effort 2.8 - 3 Min At 80 RPM - On the Way Down 3:00
- 16 Recovery 3.7 - 90 Seconds 1:31
- 16 Recovery 2.7 - 30 Seconds 0:29
- 16 Effort 3.8 - 2x3 - First 3 Min At 80 RPM - On the Way Up 3:00
- 16 Effort 1.8 - 2 Min Effort At 70 RPM - On the Way Down 2:00
- 15 Recovery 2.7 - On the Way Down 1:59
- 15 Effort 3.7 - 2 Mins At 175 BPM 1:42
- 15 Strides 2.1 - First 30 Second All Out Sprint 0:31
- 15 Run Faster 1 Cool Down 3:20
- 15 Recovery 3.7 - On the Way Up 1:00
- 15 Recovery 1.7 - On the Way Down 1:00
- 14 Effort 2.7 - 5 Min At 80 RPM - On the Way Down 5:00
- 14 Recovery 3.6 - 90 Seconds 1:30
- 14 Recovery 2.6 - 60 Seconds 1:04
- 14 Recovery 1.6 - 30 Seconds 0:31
- 14 Effort 3.7 - 3x2 - Final 2 Min At 70 RPM - On the Way Up 2:00
- 14 Effort 1.7 - 3 Min At 80 RPM - On the Way Down 3:00
- 13 Recovery 3.6 - On the Way Up 1:00
- 13 Effort 3.6 - 4 Mins At 175 BPM 3:56
- 13 Recovery 1.6 - On the Way Down 1:00
- 13 Effort 2.6 - 90 Seconds At 175 BPM 1:30
- 13 Strides 1.2 - Final 30 Second All Out Sprint 0:30
- 13 Recovery 2.6 - On the Way Down 2:00
- 12 Effort 1.6 - 4 Min At 85 RPM - On the Way Down 4:00
- 12 Effort 2.6 - Top of the Pyramid - 10 Mins At 92 RPM 10:00
- 12 Effort 3.6 - 3x2 - Second 2 Min At 70 RPM - On the Way Up 2:00
- 12 Recovery 1.5 - 30 Seconds 0:29
- 12 Recovery 2.5 - 90 Seconds 1:29
- 12 Recovery 3.5 - 90 Seconds 1:30
- 11 Recovery 3.5 - On the Way Up 1:00
- 11 Strides 1.1 - First 30 Second All Out Sprint 0:31
- 11 Effort 3.5 - The Big One - 6 Mins At 180 BPM 6:02
- 11 Recovery 2.5 - On the Way Up 2:00
- 11 Recovery 1.5 - On the Way Down 1:00
- 11 Effort 2.5 - 5 Mins At 180 BPM 4:58
- 10 Effort 2.5 - 5 Min At 80 RPM - On the Way Up 5:01
- 10 Recovery 3.4 - 90 Seconds 1:31
- 10 Recovery 2.4 - 90 Seconds 1:30
- 10 Recovery 1.4 - 90 Seconds 1:33
- 10 Effort 3.5 - 3x2 - First 2 Min At 70 RPM - On the Way Up 2:00
- 10 Effort 1.5 - Top of the Pyramid - 5 Mins At 92 RPM 5:00
- 9 Effort 1.4 - 4 Mins At 180 BPM 4:01
- 9 Effort 3.4 - 4 Mins At 180 BPM 4:05
- 9 Effort 2.4 - 4 Mins At 180 BPM 4:05
- 9 Recovery 2.4 - On the Way Up 1:30
- 9 Recovery 1.4 - On the Way Up 1:00
- 9 Recovery 3.4 - On the Way Up 0:59
- 8 Recovery 3.3 - 90 Seconds 1:30
- 8 Effort 1.4 - 4 Min At 85 RPM - On the Way Up 4:00
- 8 Recovery 2.3 - 90 Seconds 1:30
- 8 Recovery 1.3 - 90 Seconds 1:30
- 8 Effort 3.4 - 4x1 - Final 1 Min At 60 RPM - On the Way Up 1:00
- 8 Effort 2.4 - 3 Min At 80 RPM - On the Way Up 3:00
- 8 Relax With Chrissie Wellington 24:30
- 7 Effort 3.3 - 4 Mins At 175 BPM 4:01
- 7 Effort 2.3 - 4 Mins At 175 BPM 3:56
- 7 Effort 1.3 - 3 Mins At 175 BPM 3:01
- 7 Recovery 3.3 - On the Way Up 1:00
- 7 Recovery 2.3 - On the Way Up 1:00
- 7 Recovery 1.3 - On the Way Up 1:00
- 7 Run Faster 3 With Chrissie Wellington 52:11
- 6 Recovery 3.2 - 60 Seconds 0:59
- 6 Recovery 2.2 - 60 Seconds 1:01
- 6 Recovery 1.2 - 60 Seconds 1:01
- 6 Effort 3.3 - 4x1 - Third 1 Min At 60 RPM - On the Way Up 1:00
- 6 Effort 2.3 - 2 Min At 70 RPM - On the Way Up 2:00
- 6 Effort 1.3 - 3 Min At 80 RPM - On the Way Up 3:00
- 6 Run Faster 2 With Chrissie Wellington 39:58
- 5 Effort 2.2 - 2 Mins At 180 BPM 2:08
- 5 Awaken Possibility 2:26
- 5 Effort 3.2 - 2 Mins At 180 BPM 2:08
- 5 Effort 1.2 - 2 Mins At 180 BPM 2:08
- 5 Recovery 3.2 - On the Way Up 1:00
- 5 Recovery 2.2 - On the Way Up 1:00
- 5 Recovery 1.2 - On the Way Up 1:00
- 5 Run Faster 1 With Chrissie Wellington 25:33
- 4 Visualise Your Race 12:14
- 4 Recovery 2.1 - 60 Seconds 0:59
- 4 Recovery 1.1 - 60 Seconds 0:59
- 4 Effort 3.2 - 4x1 - Second 1 Min At 60 RPM - On the Way Up 1:00
- 4 Effort 2.2 - 2 Min At 70 RPM - On the Way Up 2:00
- 4 Effort 1.2 - 2 Min At 70 RPM - On the Way Up 2:00
- 4 So Let's Go 3:11
- 4 Ride Harder 3 With Chrissie Wellington 37:02
- 4 Recovery 3.1 - 60 Seconds 1:00
- 3 Effort 3.1 - 2 Mins At 175 BPM 2:01
- 3 Effort 2.1 - 2 Mins At 175 BPM 1:59
- 3 Effort 1.1 - 2 Mins At 175 BPM 2:00
- 3 Recovery 3.1 - On the Way Up 1:00
- 3 Recovery 2.1 - On the Way Up 0:59
- 3 Recovery 1.1 - On the Way Up 1:00
- 3 Ride Harder 2 With Chrissie Wellington 0:07
- 3 Test Your Limits 3:12
- 3 Relax Your Body 4:20
- 2 Warm Up, Part 3.2 5:00
- 2 Relax Your Breathing 3:56
- 2 Warm Up, Part 2.2 3:07
- 2 Warm Up, Part 1.2 2:04
- 2 Effort 3.1 - 4x1 - First 1 Min At 60 RPM - On the Way Up 1:00
- 2 Effort 2.1 - 1 Min At 60 RPM - On the Way Up 1:00
- 2 Effort 1.1 - 1 Min At 60 RPM - On the Way Up 1:00
- 2 Dreams and Goals 2:57
- 2 Ride Harder 1 With Chrissie Wellington 40:04
- 1 Run Faster 3 - Introduction and Warm Up 5:01
- 1 Run Faster 2 - Introduction and Warm Up 1:56
- 1 Run Faster 1 - Introduction and Warm Up 1:57
- 1 Ride Harder 3 - Introduction and Warm Up 10:03
- 1 Relax to Get Fitter 1:34
- 1 Power of Sport 3:02
- 1 Ride Harder 1 - Introduction and Warm Up 4:02
- 1 Ride Harder 2 - Introduction and Warm Up 5:03
- 1 Lace Up With Chrissie Wellington 12:22